


These make great card decorations, scrapbook embellishments and journal decor. They are perfect for gift bags too. Grab these files today and print them as many times as you want. Digital files are an excellent value.

Handmade cards with a vintage flair along with a plethora of creative crafts.
These make great card decorations, scrapbook embellishments and journal decor. They are perfect for gift bags too. Grab these files today and print them as many times as you want. Digital files are an excellent value.


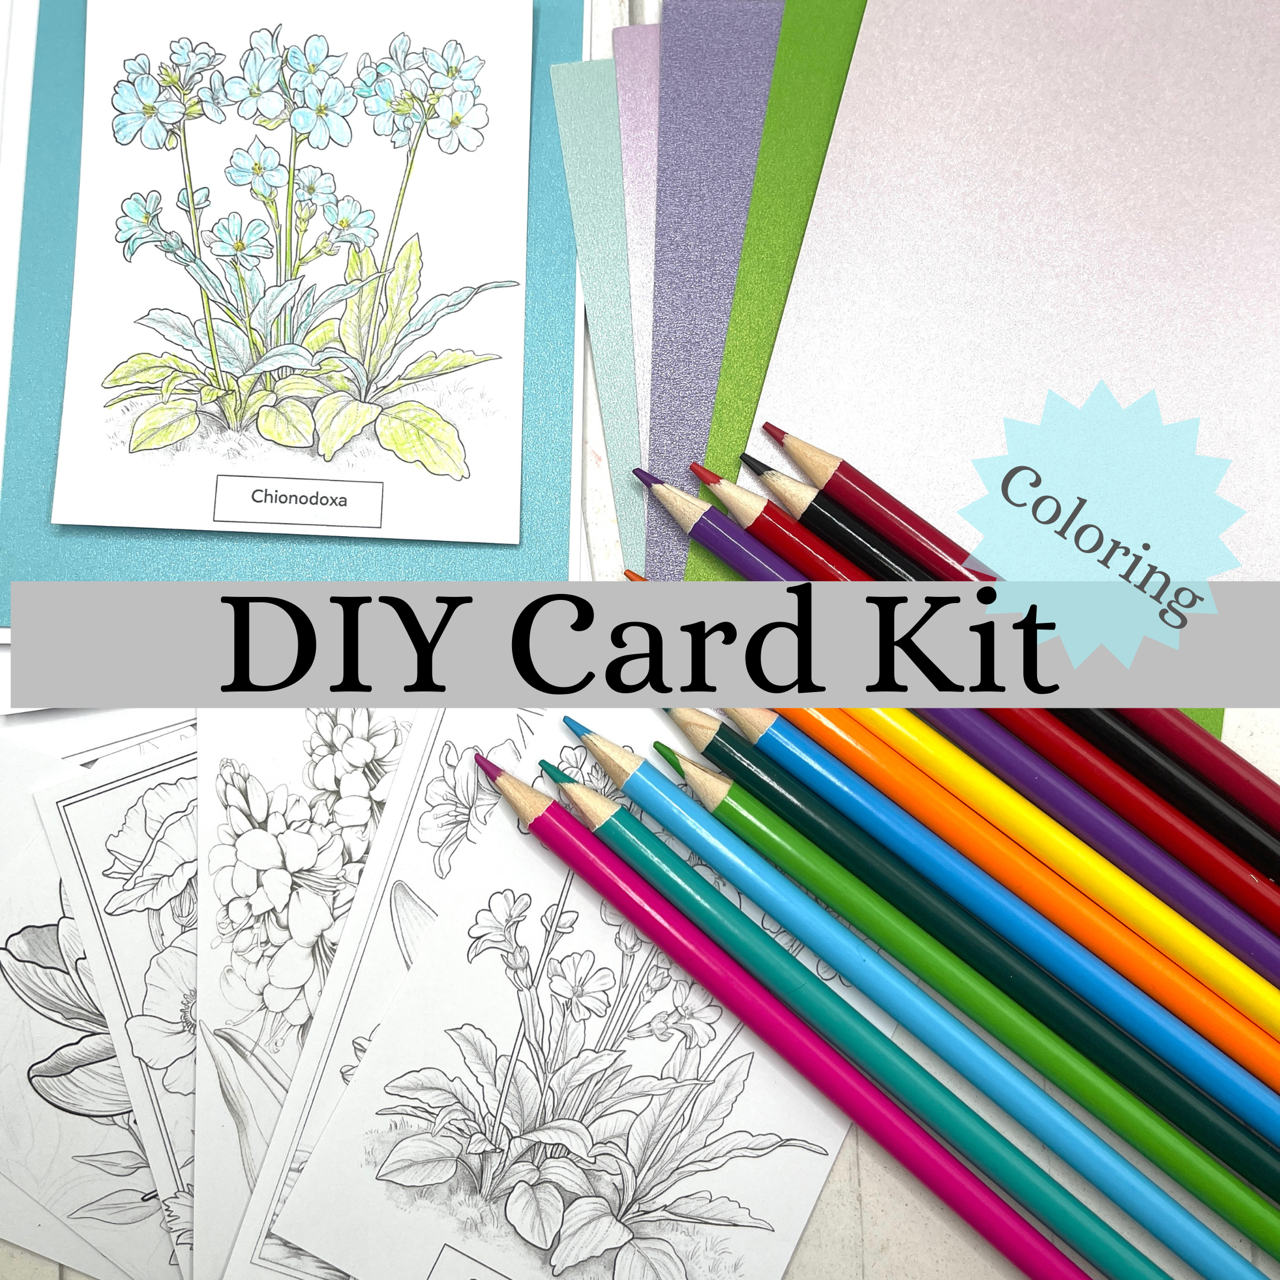
Create beautiful handmade greeting cards with this comprehensive card making bundle featuring elegant botanical flowers and adult coloring elements. This beginner-friendly handmade set includes everything needed to craft six stunning watercolor-style nature art greetings, perfect for those just starting their creative journey.


Fall Gift Tags


Have you ever seen a coloring book design that was beautiful but you weren't sure how to use it in your craft projects?

Using Coloring Book Page Designs in Paper Crafting
Coloring books provide a meditative coloring experience. These same designs can serve as a foundation for paper crafting due to their:
Intricate Patterns: From mandalas to floral motifs, coloring book pages offer a rich tapestry of patterns that translate beautifully onto paper.
Artistic Inspiration: They provide a starting point for creativity, offering both structure and room for personal interpretation.
Infinite Possibilities: Digital coloring pages can be printed an unlimited number of times allowing for different colorways.

Backgrounds: Use uncolored and embellished coloring book pages as backgrounds for greeting cards. Trim them to fit and layer with sentiments and decorations. You could always color them to match your theme.
Die-Cutting: Utilize intricate designs from coloring pages as templates for die-cutting shapes and borders for your cards.
Embellishments: Cut out colored sections of the designs to use as decorative elements on scrapbook pages.
Frames and Borders: Create custom frames or borders for your photos by incorporating parts of colored designs.
Wall Art: Frame completed coloring pages to create unique wall art pieces for your home.
Decoupage: Apply sections of colored designs onto objects like trays or boxes using decoupage techniques for personalized home decor.
Custom Gift Wrap: Use colored sections of designs to wrap gifts creatively, adding a personal touch.
Gift Tags: Cut out smaller sections of colored designs to make custom gift tags that match your wrapping paper.

So, the next time you pick up a coloring book, envision the endless possibilities beyond the pages. Let your creativity soar as you merge the worlds of coloring and paper crafting into delightful works of art that are uniquely yours. Happy crafting!

Enjoy this beautiful peacock freebie! Use these background papers for cards, junk journals, scrapbooks and more. Just download and print!
You are invited to join our new Facebook group, Digitally Creative at Paperie By Jennifer. I will post new digital products and lots of inspiration. We invite our members to share their creations using digitals from Paperie By Jennifer.

Subscribe to our weekly emails to be notified of our weekly freebies and our new digital products.

New Colorful Heart Sticker Sheets
from PaperieByJennifer
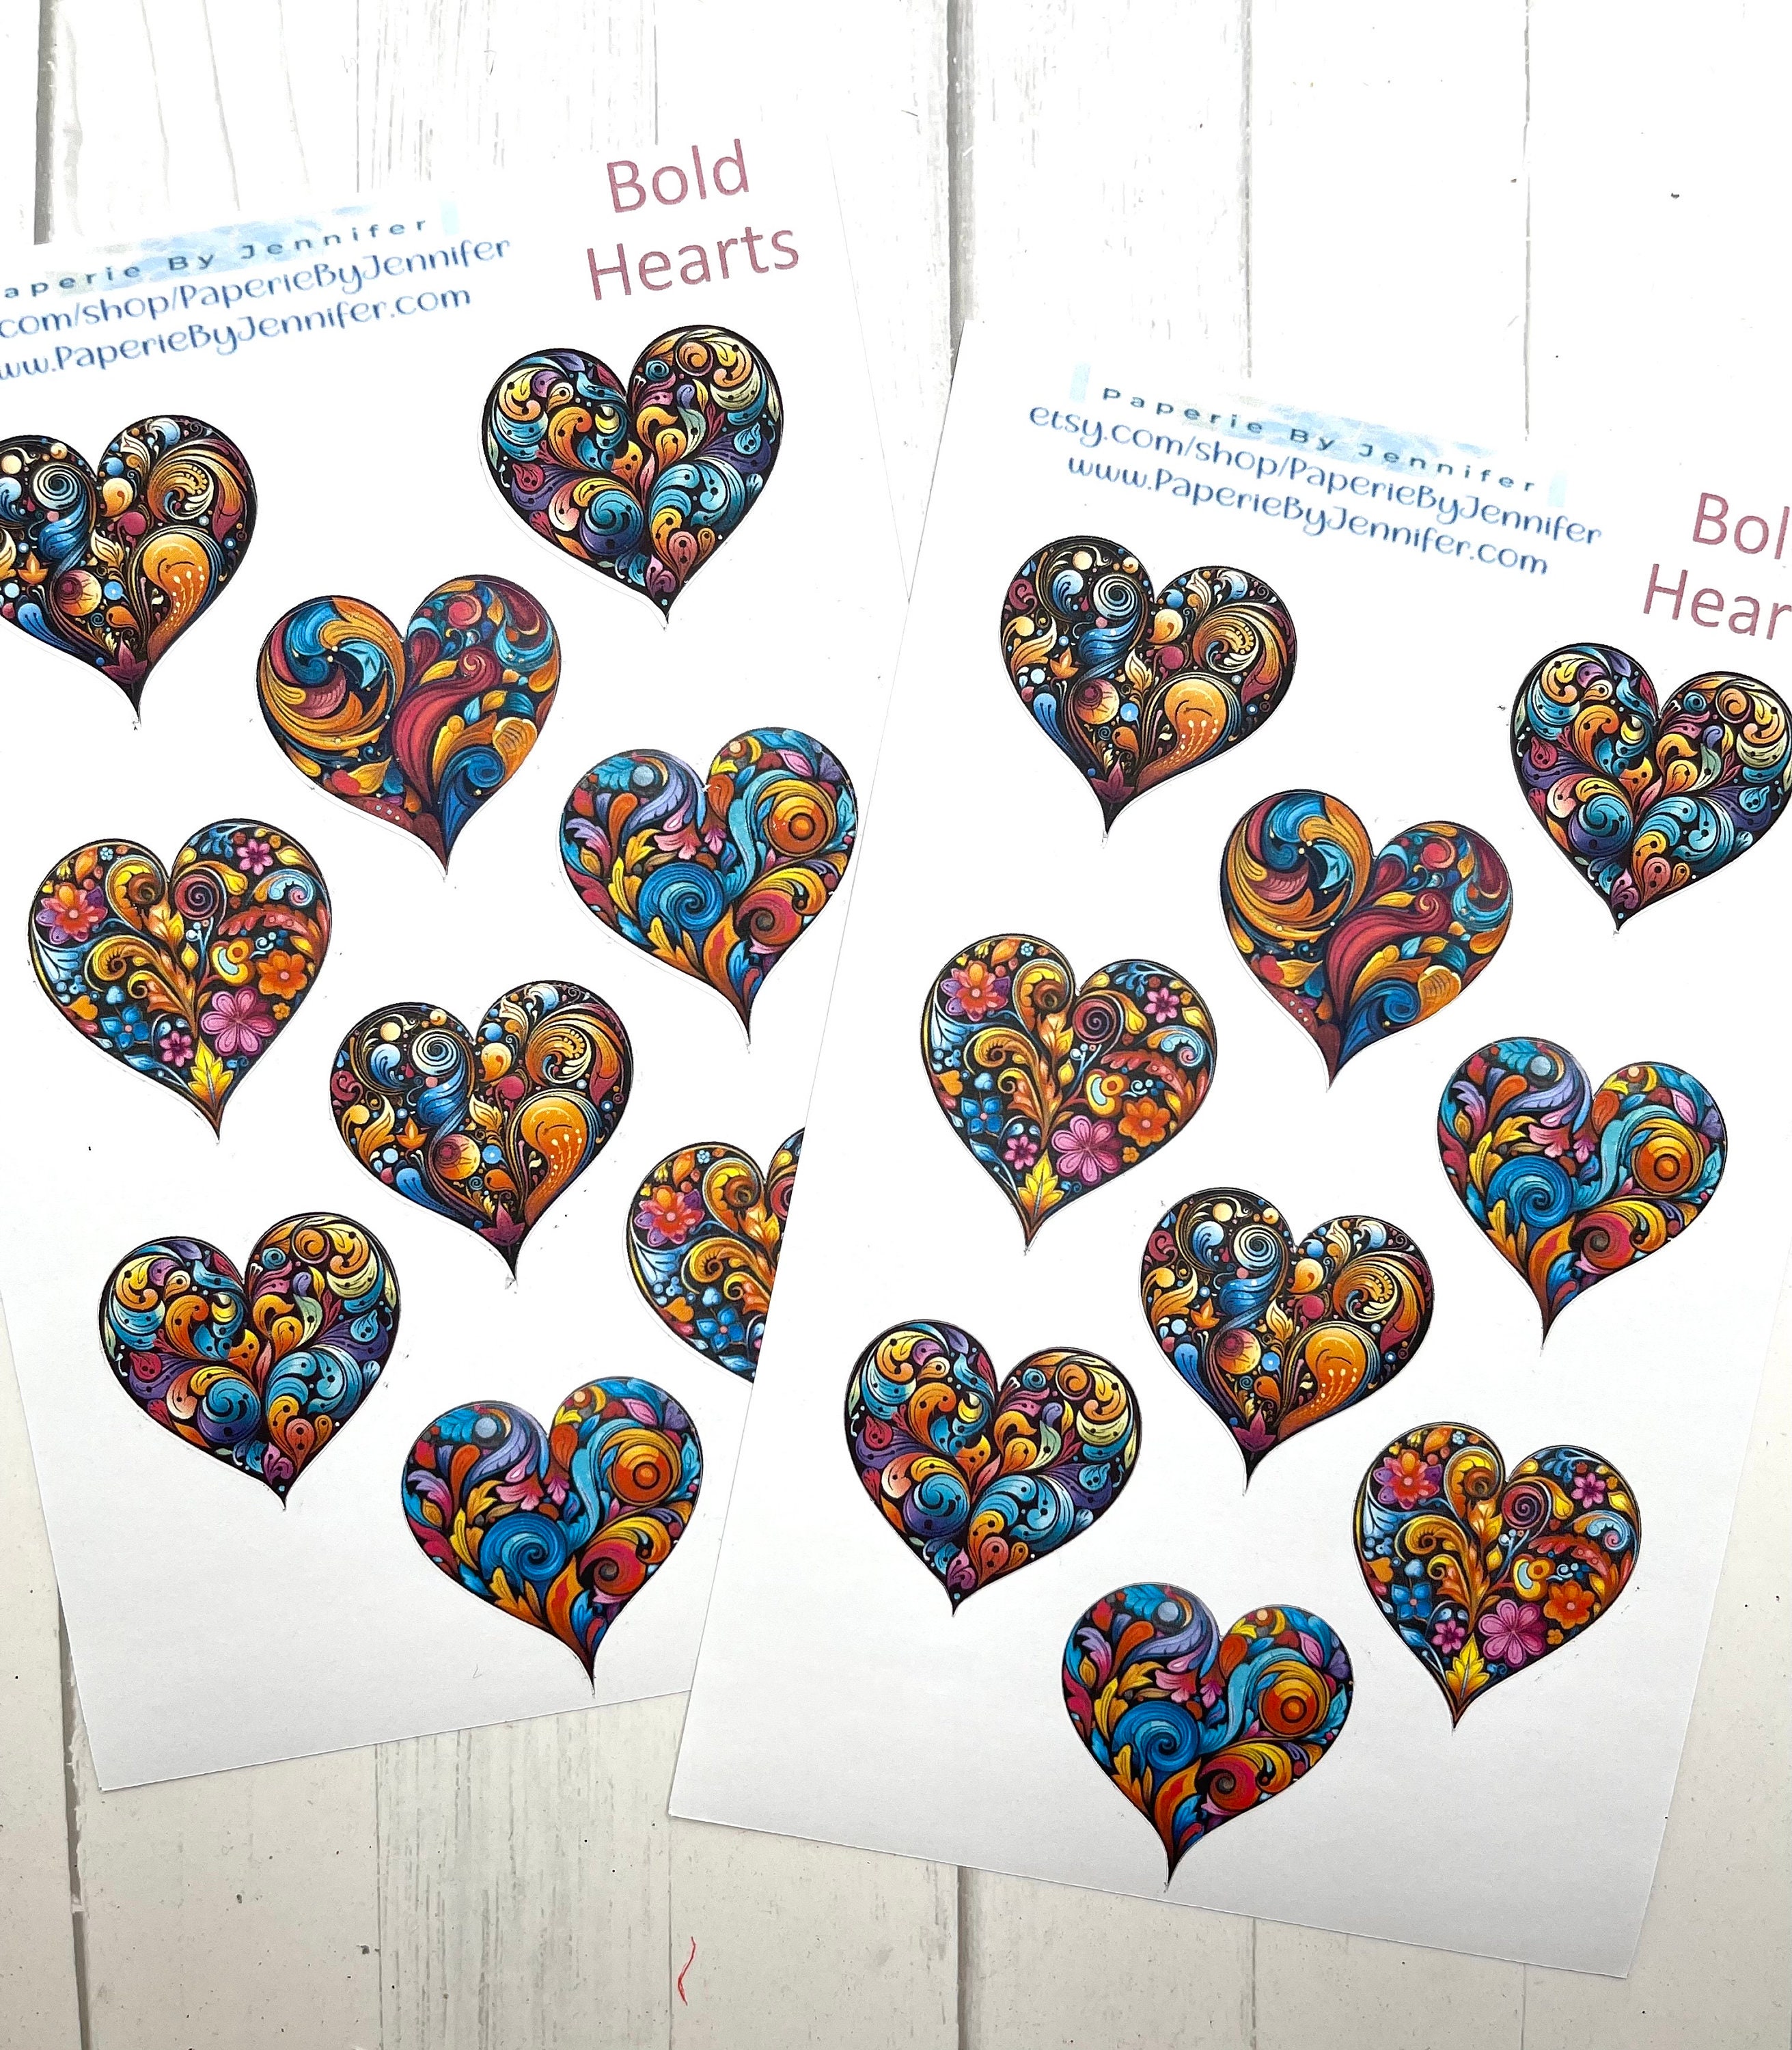
Just in time for Valentine's Day, I created new colorful heart stickers. These come in sheets of 2 for a total of 18 stickers. These stickers are perfect for adding a festive touch to the back of an envelope or on your cards and journals.

Materials you will need:
1. Cardstock or pre-made blank card
2. Stickers of your choice (various sizes, shapes, and designs)
3. Scissors (optional)
4. Adhesive (glue or double-sided tape)
5. Additional embellishments (optional)
Step 1: Choose your stickers
Select a variety of stickers that suit the theme or style you want for your card. Consider using stickers with different sizes, shapes, patterns, or textures. This will add depth and visual appeal to your background.

Step 2: Plan the layout
Before adhering the stickers, lay them out on your cardstock or blank card to determine the desired arrangement. You can experiment with different placements and orientations to find the most visually pleasing design.

Step 3: Adhere the stickers
Once you have planned the layout, peel off the backing of each sticker and carefully place them on the cardstock or card. Press them down firmly to ensure they adhere properly. If you prefer a neater look, you can trim any excess sticker edges with scissors.
Step 4: Fill the entire background
Continue adding stickers to cover the entire background, ensuring that the stickers overlap slightly or touch each other. This will create a cohesive and visually appealing pattern. Be creative and mix different sticker designs and sizes to add interest.

Step 5: Consider additional embellishments
If desired, you can further enhance your card background by adding other embellishments. For example, you can incorporate ribbon, sequins, gems, or die-cut shapes. Place them strategically around the stickers to create a balanced and cohesive design.
Step 6: Trim and finalize the background
Once you have finished adhering the stickers and any additional embellishments, trim the edges of the cardstock if necessary to fit your desired card size. If you're using a pre-made blank card, you can skip this step. Ensure that the background is neat and clean.
Step 7: Complete your card
With the sticker background in place, you can now complete your card. Add a sentiment, focal point, or any other desired elements. You can stamp, write, or use die cuts to personalize your card and make it unique.

Step 8: Finishing touches
Take a moment to review your card and make any final adjustments or additions. Ensure that all the stickers are securely adhered and that the overall design is visually pleasing. Pay attention to details and make any necessary tweaks to achieve the desired outcome.
By following these steps, you can create a card background using stickers that adds a delightful and professional touch to your handmade cards. Enjoy the process and have fun experimenting with different sticker designs and arrangements!
As an Amazon Associate I earn from qualifying purchases.


Using alcohol markers to blend colors when coloring stamped leaf designs for a card can create a beautiful and vibrant effect. Here's a step-by-step guide to help you achieve smooth color blending:
Materials you will need:
1. Stamped leaf designs on cardstock or marker-friendly paper
2. Alcohol markers in various colors (preferably with a brush or chisel tip)
3. Blending solution or alcohol (optional)
4. Scrap paper or a protective mat

Step 1: Choose your color palette
Select the alcohol markers that you want to use for coloring the stamped leaf designs. Consider choosing colors that work well together and create a harmonious color palette.
Step 2: Start with light colors
Begin by coloring the leaves with a light color. This will serve as the base color for your blending. Use gentle strokes to fill in the leaf, ensuring even coverage. Leave some white space on the leaf to create highlights.

Step 3: Add a darker shade
Next, choose a slightly darker shade of the same color or a complementary color. Begin adding this color to the areas where you want more depth or shadow. Start with the edges or the areas that would naturally be darker. Use light, flicking strokes to create texture and blend it into the lighter color.
Step 4: Apply the blending technique
To blend the colors seamlessly, use the following techniques:
a. Feathering: Take the lighter color marker and lightly stroke it over the border between the two colors, creating a feathered effect. This helps to blend the colors together.
b. Layering: Apply additional layers of the lighter and darker colors, alternating between them, to create a smooth transition between shades. Blend the colors together with gentle strokes.
c. Gradation: To achieve a gradual color change, start with the lighter color and gradually introduce the darker color, layer by layer, allowing them to blend naturally.

Step 5: Experiment with blending solution or alcohol (optional)
If you want to achieve even smoother blends, you can use a blending solution or a small amount of rubbing alcohol. Apply a tiny amount of the solution onto the area where you want to blend the colors and use the markers to further blend and spread the colors together. Be cautious when using the solution, as it can cause the ink to bleed if too much is applied.
Step 6: Practice on scrap paper
Before applying the markers directly to your stamped leaf designs, practice the blending technique on scrap paper to get comfortable with the colors and the blending process. This allows you to adjust your technique and color choices before working on the actual design.
Step 7: Finishing touches
Once you are satisfied with the blending on your stamped leaf designs, you can add any additional details or embellishments to enhance the overall look of the leaves. Consider adding veins, highlights, or shading with a fine-tip black marker or colored pencils.
By following these steps, you can achieve beautiful color blending with alcohol markers on your stamped leaf designs for a card. Enjoy the process and have fun creating your personalized and vibrant leaf designs!
As an Amazon Associate I earn from qualifying purchases.
